How to grow and care for snow peas plants (A Complete guide)

Pisum sativum L., sometimes known as snow peas, is a member of the Macrocarpon group and are crispiest and crunchiest when picked fresh for your early spring garden. These cold-season vegetables are often sown in the early spring, but they can also be cultivated in late summer for a fall harvest. In warmer climates, many varieties can even thrive as a winter crop.
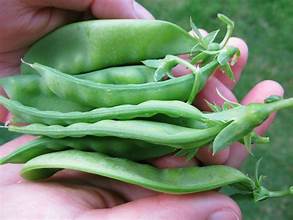
The word “mangetout,” which is French for “all-eat,” emphasizes that the pods and peas are edible. The blossoms, tendrils, and stems of the peas are also edible. Snow peas are a popular addition to stir-fries and salads because they give a beautiful crunch and fresh flavor.
Overview of snow peas
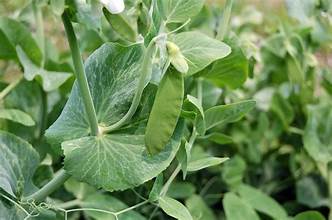
Snow peas, often referred to as mangetout, sugar peas, or Chinese pea pods, are a member of the Fabaceae family and the botanical group Pisum sativum L, commonly known as the macrocarpon group. These annual veggies thrive in full to partial sun and develop as 36–72 inch long vines. They love loamy soil that is acidic in pH, wet, and well-drained. Native to Eurasia, snow peas are suitable for USDA hardiness zones 2a–11b.
How to plant snow peas
Best time for Snow peas cultivation
Similar to other green peas, snow peas are an early spring crop that should be planted in the garden as soon as the soil is suitable, usually four to six weeks ahead of the latest frost date that regularly occurs in your area. For snow peas to germinate, the ideal temperature range is 45 to 70 degrees Fahrenheit. Since snow peas cease to thrive when temperatures rise above 85 degrees Fahrenheit, it is imperative that you plant during this brief window.
Consider growing more pea shoots in succession specifically for the shoots, which may be harvested in a few weeks, if you appreciate the blooms as well. Plant an autumn crop approximately two months ahead of the typical first frost date. Select a variety that matures early and can withstand powdery mildew, a common late-summer fungus, when planting in the autumn.
Select a suitable site
Choose a place with well-draining soil, full sun to light shade. To reduce the danger of pests and diseases, follow crop rotation rules and avoid growing snow peas in the same location where other legumes were produced in the previous two years.
Spacing, depth and support
Depending on the height of the vines, you will need to adjust the distance between rows. Taller types need more space, so leave 18 to 36 inches between rows to allow for easier harvesting. Plant the seeds approximately 1 inch deep and 1 1/2 to 2 inches apart.
Snow peas are a great idea to trellis, regardless of size. This ensures that the vines get plenty of sunlight and prevents them from rotting on the wet ground. It also makes harvesting easier because even shorter varieties could collapse under the weight of their pods.
Provide a trellis net or chicken wire for the pea tendrils to cling to. Make sure the trellis bottom is no higher than 3 to 4 inches above the ground to allow the young plants to climb it quickly.
Care for snow peas
Soil and light
Snow peas can grow in moderate shade, but they prefer full sun, ideally six to eight hours of direct sunlight. Avoid too much direct sunshine as it can burn the delicate vines. The ideal soil has a pH of 6.0 to 6.5, be well-drained, be high in organic matter, and be somewhat acidic.
Water and fertilizer
Snow peas need a lot of water—at least one inch every week—to keep their pods crispy and crisp instead of stringy and tough. Keep late crops well-watered when the weather heats, but make sure there is adequate drainage to avoid root and seed rot. Snow pea fertiliser usually isn’t needed if your garden soil has been modified with compost and is high in organic matter.
Humidity and temperature
Snow peas grow well in cold climates and may even withstand the occasional late snowfall. They are unaffected by light frost in the spring or autumn, but germination is slowed down when the soil drops below forty degrees Fahrenheit. Like any other pea, they suffer in temperatures higher than 85 degrees Fahrenheit. Humid weather is not an issue as long as the temperatures stay low.
Pollination of snow pea
Snow peas don’t need the wind or insects to pollinate, just like other peas do. They are self-pollinators.
Harvesting of Snow peas
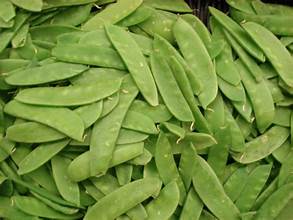
Snow peas should be harvested just before they get too big, but before you can feel them beginning to bulge inside the pods. The pods ought to remain flat. Because the pods grow swiftly, check on the plants every other day as they mature. Harvesting the plant often stimulates it to continue producing.
To harvest, either hold the vine with one hand and carefully break it off with the other, or cut the pod with scissors. Pea shoots can be harvested as soon as they sprout by pinching them off with your fingers or cutting them with garden shears. If you leave it too long, the pea shoots will get fibrous and the snow peas will turn stiff and starchy.
Growing snow peas in pots
Tall snow pea vines can be difficult to grow in pots because of their propensity to fall over. Use a pot with drainage holes that is at least 12 inches in diameter if you want to grow them effectively in containers. When planting, erect a trellis and fill it with a mixture of compost and well-draining potting soil. Choose a small-sized cultivator and place three or four seeds in each pot. Compared to garden plants, snow peas in containers will need to be watered more frequently.
Propagation of snow peas
Snow pea seeds are used for propagation. Since most types are open-pollinated, you can save the seeds for the next year. You will need to buy new seeds from a seed provider for hybrid varieties. Leave a few pods on the vines until the peas are fully grown and dry on the vine in order to gather seeds. Cut the peas off after they start to rattle inside the pods and allow them to air dry for a few days. Till the time comes to sow, keep the dried seeds in a cool, dry location.
How to grow snow peas from seed
To cultivate snow peas from seed, it is usually advised to vaccinate the seeds prior to sowing. Peas can grow without an inoculant, but if one is used, it promotes the development of nitrogen-producing nodules on the roots of the plant, which is good for the plant’s growth.
How to sow snow pea seeds:
1. To loosen the soil, till it. In rows 12 to 36 inches apart, plant the seeds 1 1/2 to 2 inches apart and 1 inch deep. Using a nozzle to water the soil evenly and gently will help prevent upsetting the seeds. Maintain constant moisture in the soil.
2. Depending on the climate, snow pea seeds normally germinate in 5 to 10 days.
Overwintering
Vegetable snow peas are cultivated once a year. After the plants are harvested, they ought to be taken out and disposed of.
Pests and disease problems
Among the common diseases and pests that snow peas face are:
Rot in Pea Roots: Foliage dieback and yellowing are caused by this disease. Make sure the soil is well-drained and engage in crop rotation to prevent it.
Floury Mildew: In snow peas, powdery mildew is a common sight in warm weather. Opt for cultivars that are resistant to this fungus.
Insects: Pea weevils and aphids are also a concern. Use a garden hose and spray nozzle to wash the plants to get rid of small infestations. Use insecticidal soap on the plants in more serious situations.
FAQs
Are snow peas considered a vine or a bush?
Snow peas are grown on thin, variable-length vines. Dwarf cultivars require support from a trellis to grow upright, even though their height does not exceed three feet.
Why are my pea seeds surfacing from the soil?
Rain or moisture may cause pea seeds that are sown too shallowly to float to the top. As soon as you see that the seeds are exposed, gently press them back into the soil because if you leave them exposed, they will dry out and stop germination. Tamp the earth around the seeds just a little bit. Sow the seeds an inch deep to prevent this problem.
Do snow peas require thinning?
If planted properly, snow peas usually don’t require thinning because dense planting encourages mutual support. To prevent disease, you might need to cut a few plants if the row gets too dense and there is insufficient air circulation. To prevent harming the neighboring plants’ roots, always use scissors to trim any additional seedlings at the soil line rather than ripping them out.


